If your computer is having trouble playing the latest games or displaying graphics, you will likely need to upgrade your graphics card. But how do you know what type of graphic card you need?
In this blog article, you’ll learn how to check your Windows 10 system for graphic card information and what kind of graphic card to buy.
- How to Check Your Graphics Card on Windows 10
- Graphics Card Specifications
- How to Install a New Graphics Card in Windows 10
- How to Check if Your Graphics Card is Working
- How to Check Graphics Card on Windows 10
- What to Check Before Buying a Graphics Card
- Troubleshooting Graphics Cards on Windows 10
- Conclusion
How to Check Your Graphics Card on Windows 10
This blog post will show you how to check your graphics card on Windows 10. To do so, open the “Devices and Printers” window by pressing the Win+X keys together, clicking “Device Manager,” and then selecting the “Graphics Cards” category.
Right-click on the graphics card you want to check and select “Properties.” In the properties window, click on the “Driver Status” tab. If there is an error message in this tab, please read below for more information about it.
If everything looks good in the Driver Status tab, click on the “Operating Systems” tab and make sure that your graphics card is listed there.
Please download and install the latest drivers from your graphics card manufacturer’s website if it isn’t. Lastly, make sure that you have installed all of Windows 10’s updates (including optional updates) before trying to check your graphics card again.
Graphics Card Specifications
Graphics cards are important parts of desktop and laptop computers, so it is important to understand their specifications to buy the right one for your needs.
Some key specifications to consider when looking for a graphics card include the following:
- The number of cores the card has
- The type of graphics processing unit (GPU) that it uses
- The amount of memory it has
- The card’s maximum resolution
- How many DisplayPort 1.2 ports the card has
- How many HDMI ports the card has
How to Install a New Graphics Card in Windows 10
This tutorial will show you how to install a new graphics card in Windows 10. Before you start, ensure your computer is properly equipped with the necessary drivers installed.
- Open “Device Manager” by right-clicking the Start button and selecting “Device Manager.”
- You should see a list of devices under the “Graphics” category. If you do not see the Graphics category, expand the tree on the left until you see it.
- Right-click on the graphics card you want to install and select “Update Driver.”
- Select “Browse my computer for driver software” from the next menu and click on the “Next” button.
- Locate and select the latest drivers for your graphics card from the list of files that appears on-screen. Click on the “Install” button and wait for the installation process to complete.
- Reboot your computer after installing the new graphics card drivers so that all of its settings will take effect.
How to Check if Your Graphics Card is Working
If you are experiencing problems with your graphics card, there are a few quick and easy ways to check if it is working correctly.
One way is to open up Device Manager and look for warning or error messages related to the graphics card. Another way is to open up Catalyst Control Center and, under the Display tab, view the status of your graphics card.
If neither of these methods works, then you will need to take your graphics card to a computer repair shop for evaluation.
How to Check Graphics Card on Windows 10
If you are using a PC with Windows 10, there are a few ways to check if your graphics card is working properly. One way is to use the built-in system diagnostics. Another way is to use third-party tools.
To use the built-in system diagnostics, follow these steps:
- Open the Start menu, and click “Settings.”
- Click on “System and Security.”
- Under “System,” click on “Diagnostic and Recovery.”
- Under “Graphics and Sound,” click on “Graphics Diagnosis.”
- On the next screen, click on “Start Tracing.”
- You may be prompted to allow access to your PC’s memory, disk drives, or network resources. If so, click the appropriate button to let Windows 10 trace your system’s activity.
- When Windows 10 finishes tracing your system, it will provide you with a report that includes information about your graphics card and any detected problems.
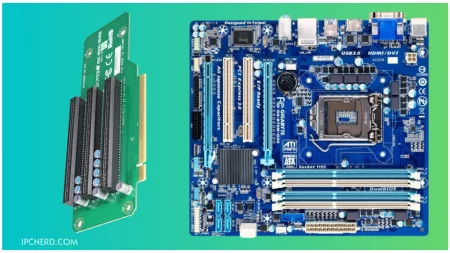
What to Check Before Buying a Graphics Card
Graphics cards are important pieces of hardware that can significantly improve the performance of a computer. Before making a purchase, you must check a few things to ensure you get the best card.
First, ensure your computer has a slot for the graphics card. Many computers have one or more dedicated graphics slots, while others may have a slot that can accommodate an expansion card.
Second, verify the size and type of graphics adapter your computer requires. Third, consider the performance requirements of the games and applications you plan on using.
Fourth, review reviews and ratings to understand how well other users have found the specific graphics card. Fifth, compare prices online to find the best deal—Lastlyconsider warranty information and any other restrictions when making your purchase.
Troubleshooting Graphics Cards on Windows 10
Graphics card errors can occur for various reasons, including issues with the video card itself, driver files, or settings in your computer. Here are a few tips to help troubleshoot common graphics card problems:
Try updating your graphics drivers if you experience crashes or black screens when playing games or using certain applications.
If you’re using an older driver version, you may need to update to the latest version. Windows updates will also install updated drivers.
If you see garbled text or images on your screen, ensure that your video driver is up-to-date and that any add-ons you have installed (like 3D glasses) are compatible with your graphics card. Disable any unnecessary background programs while gaming if they’re causing lag.
If the problem persists after following these steps, it may be time to replace your graphics card. Make sure to back up any important data before making any hardware changes.
If you are experiencing problems with your graphics card on Windows 10, there are a few things you can do to try and diagnose the problem.
First, ensure that the graphics card is properly installed on your computer. You can check this by opening Device Manager, selecting Display adapters, and looking for the graphics card listed under “Display adapters.” If the graphics card is not listed under “Display adapters,” it may not be properly installed.
If the graphics card is properly installed, you may still experience problems if the drivers are not up-to-date.
You can update the drivers by going to Device Manager and selecting Display adapters again. This time, under “Driver,” you will see a list of all available drivers for the graphics card. Right-click on the driver for your graphics card and select “Update Driver.”
Lastly, if all else fails, you can try an alternate graphic solution, such as a virtual machine or a different operating system.
Conclusion
In this article, we have shown you how to check graphics cards on Windows 10. Following the steps outlined in this article, you can troubleshoot and fix graphic issues on your computer.
If you have any other questions about how to check the graphics card on Windows 10, feel free to leave a comment below, and we will get back to you as soon as possible. Thanks for reading!